Fancy a new kitchen splashback, sink surround or a bit of bathroom beautification on the cheap? Sure, for complex jobs you're better leaving it to the pros but simple tiling jobs can be undertaken by weekend DIYers. Here are our step-by-step tips for simple jobs, what you'll need and some important design considerations too.
Got any tips of your own? Leave 'em in a comment - we'd love to hear from you.
KITCHEN SPLASHBACK PROJECT: YOU'LL NEED
- Your choice of tile
- Two timber battens
- Nails
- Spirit level
- Tile adhesive
- Notched spreader
- Pack of tile spacers
- Tile cutter and or saw
- Grout
WHAT TO DO
- Measure the area so you know how many tiles you will need. A handy way of working this out would be to take the two figures and multiply (length x width). Then measure the area of each tile, (a 10 x 10 cm tile has an area of 100cm) and divide by the previous figure. This is the rough amount of tiles you will need, but allow for extra in cutting and wastage.
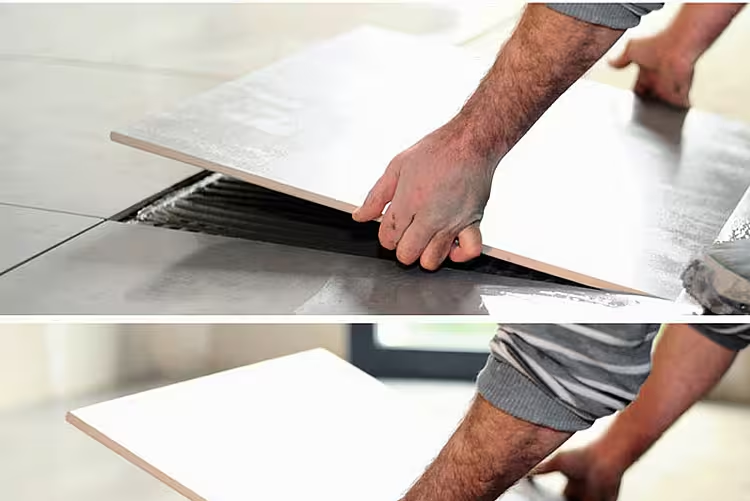
- Wash the wall and allow it to dry. Set up a guide using the timber battens, nailing one horizontally to the bottom of the wall and the other perpendicular to it. Check you have a straight and accurate frame using a spirit level. Next, using the notched spreader, apply tile adhesive in even sections over about a half a square metre of wall.
- Fix the first tile into the corner of the battens. Watch for excess glue squeezing onto the tile surface - wipe immediately with a damp cloth. Continue in rows using sliding motions when applying the tiles and inserting tile spacers to keep distances equal.
- Remove the battens - this will leave an equal space for the cut tiles to fill. Use a tile cutter for simple straight cuts, as this scores the tile surface, allowing you to snap off the remainder. A tile saw is required for more complex shapes. Handy tip: draw out your design on paper first and use as a template to gain an accurate size.
- Once the tiles are in place, allow to dry for 24 hours. Now it’s time to grout your splashback. Take your grout spreader and push grout into all the joints, working over small areas at a time.
- Wipe off excess grout from the tile surfaces with a damp sponge. Polish once dry and your kitchen will be tiled to perfection.
Choosing the right tile
Because a splashback is a functional necessity, there is more to consider than aesthetics.
Tile resistance Your splashback is a barrier against oil splatters, soap suds, food and dirt, so the tile you choose should not be porous. It must withstand high temperatures and so resistance to heat is also an important factor. Naturally Porcelain is heat, water and frost resistant making it a popular choice. Slate is exceptionally hardwearing and waterproof, while glass is practical and hygienic option.
Finish The tile finish is crucial. A rustic texture is achieved with a terracotta or travertine tile and suits a country style kitchen. In a contemporary setting, a polished finish using limestone or glass is better. Other options include porcelain, marble, copper, granite and slate.
Size Keep the measurement of the space in your head when shopping so you don’t under buy. Tiles come in relatively standard square sizes. Alternate tile sizes and shapes to achieve a varied backsplash design but are more complex to fit.
Colour Neutral cream tones lend themselves to a traditional kitchen setting. Terracotta hues give a more rustic feel, while slate can provide a natural backdrop. Consider your kitchen units: lighter tiles can really lift a dark kitchen and bright colours look vivid set against a pale wood or white. Glass is an excellent way of adding a glossy vibrancy that other tiles lack.
Price Ceramic tiles are the cheaper option due to their mass production and lack of individuality. Slate is expensive, although more reasonably priced than a marble or granite. When redesigning your kitchen, a tiled splashback is still a cheap update so is worth investing in a more expensive tile, for higher quality and lasting finish.