Punch needle is 2019’s hottest SHEiy trend. Joanne Condon lets us in on punch needling with this easy-to-follow tutorial that delivers super-cute results
Words and photography: Joanne Condon
The old craft of needle punching has made a comeback in a big way - though it should come with a warning label. Addictive and enjoyable, the main difficultly is stopping. The most amazing thing about this activity is that you can be as creative as you like: wing it or follow a pattern – you’re free to create any shape or pattern you like.
What you’ll need
Needle Punch (I got mine from Nikkimcwilliams.com)
Wool in your choice of colours
Monk’s Cloth or Aida cross-stitch fabric (I used a linen blend in 14 count)
Wooden frame
Stapler and staples
Scissors
A marker
Punch needle top tips
Always face the needle in the direction of the line you’re going
Always make sure the wool is lose and easily following from the ball]
How to create your punch needle cushion
If this is your first time trying this craft, I suggest you test your stitches on a piece of stretched fabric first. This will give you a feel for the needle punch and the stitches and lengths that you can create with it. Once you get the hang of the looping, you can start.
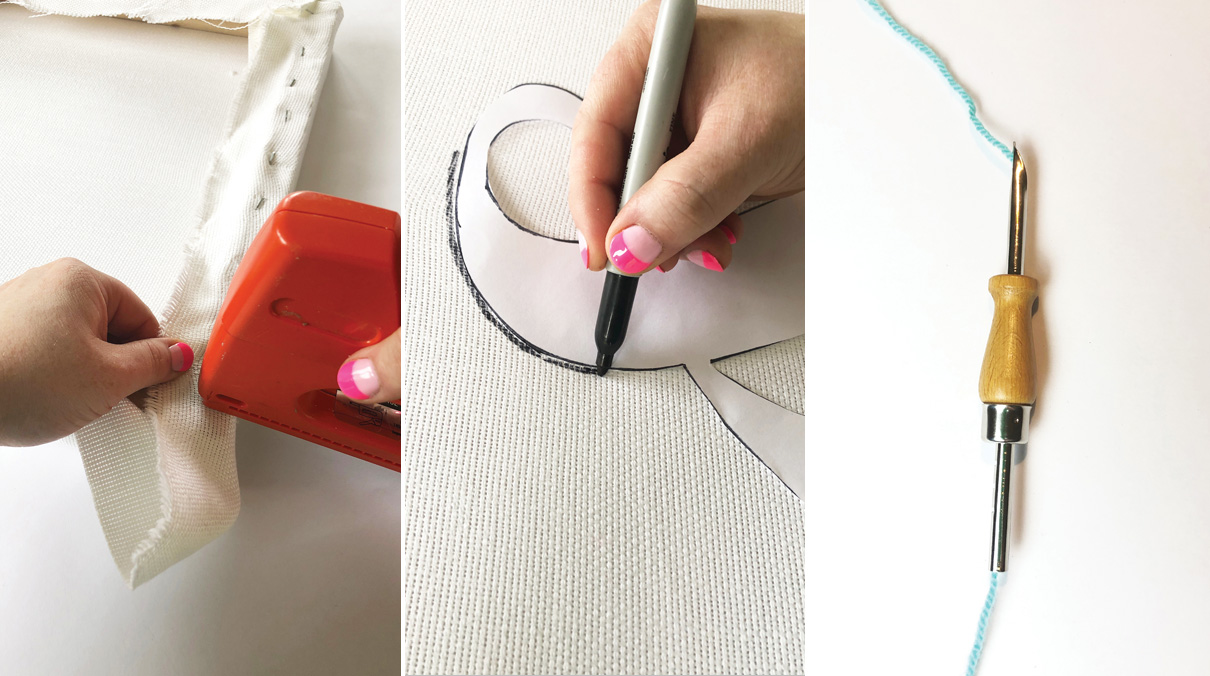
1. Stretch the fabric onto the frame. Make sure it is tensely and evenly stretched. Staple around the edges.
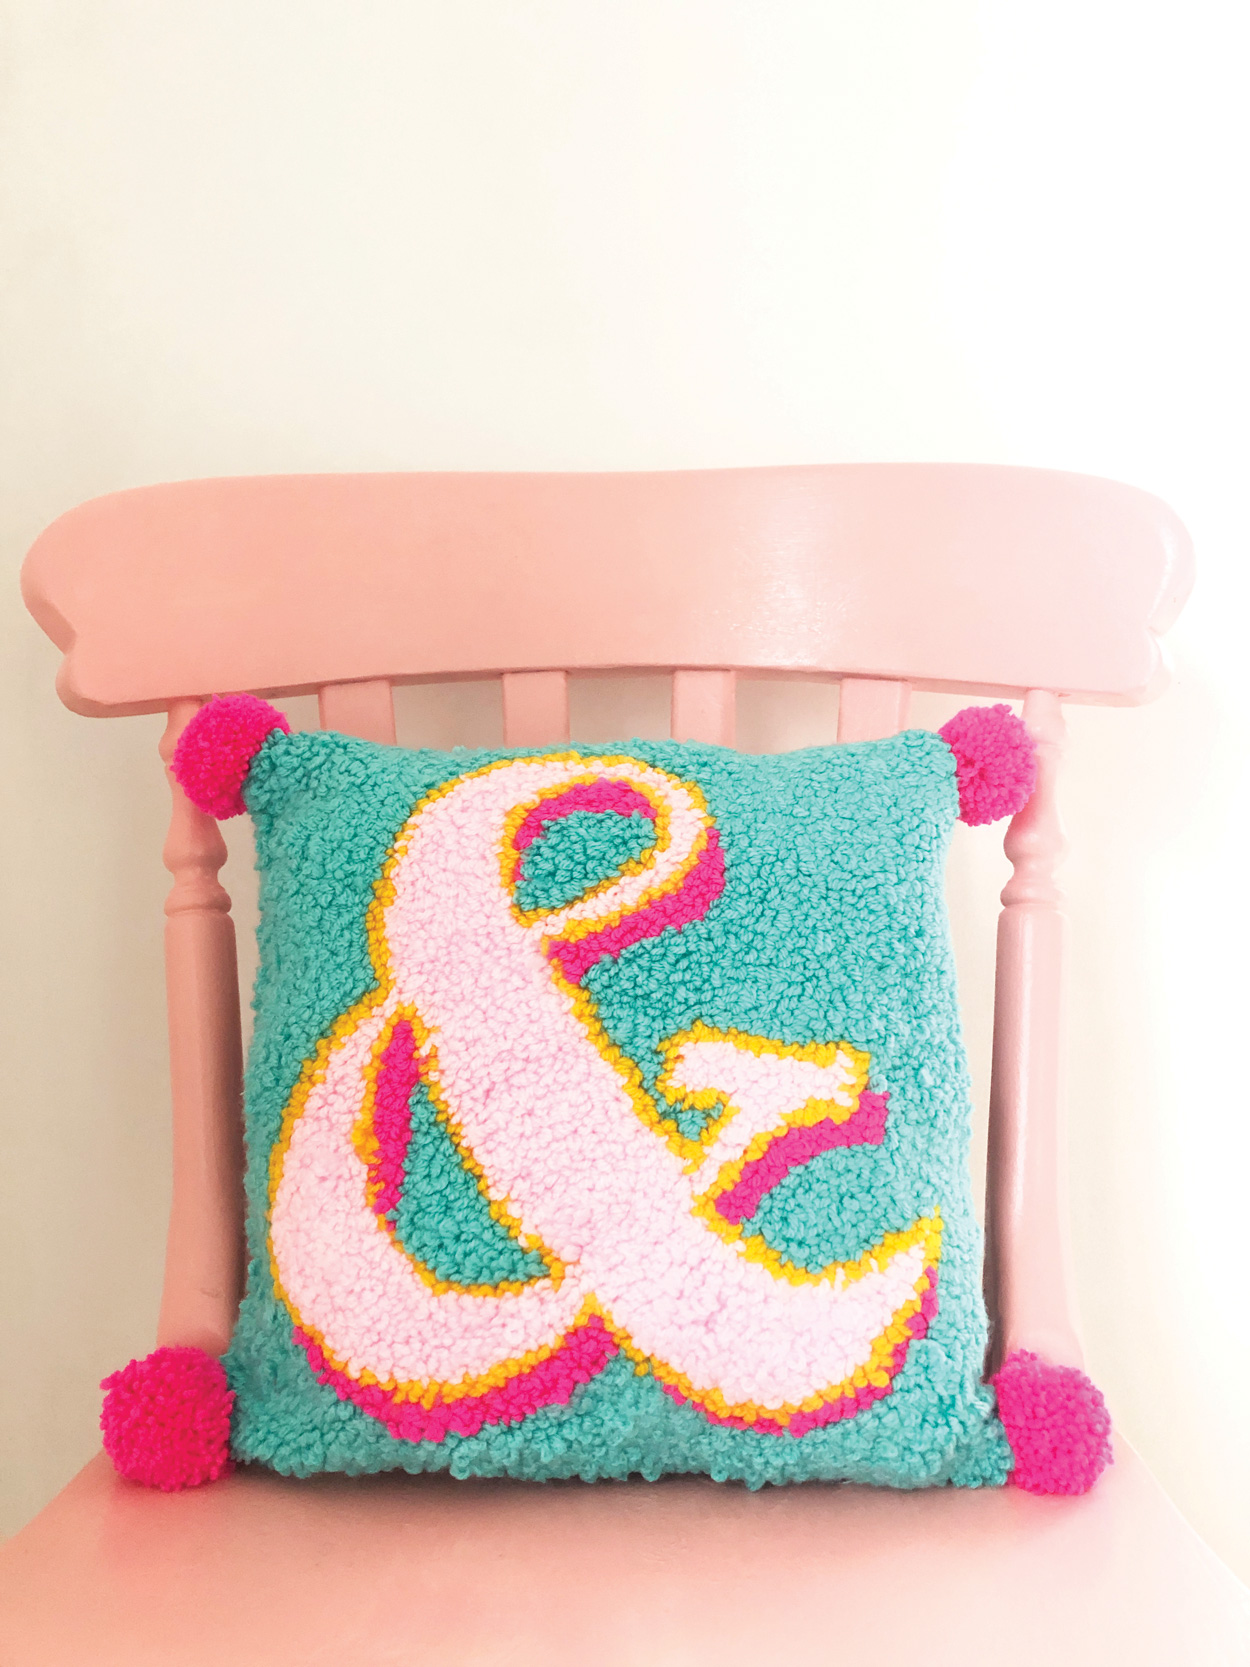
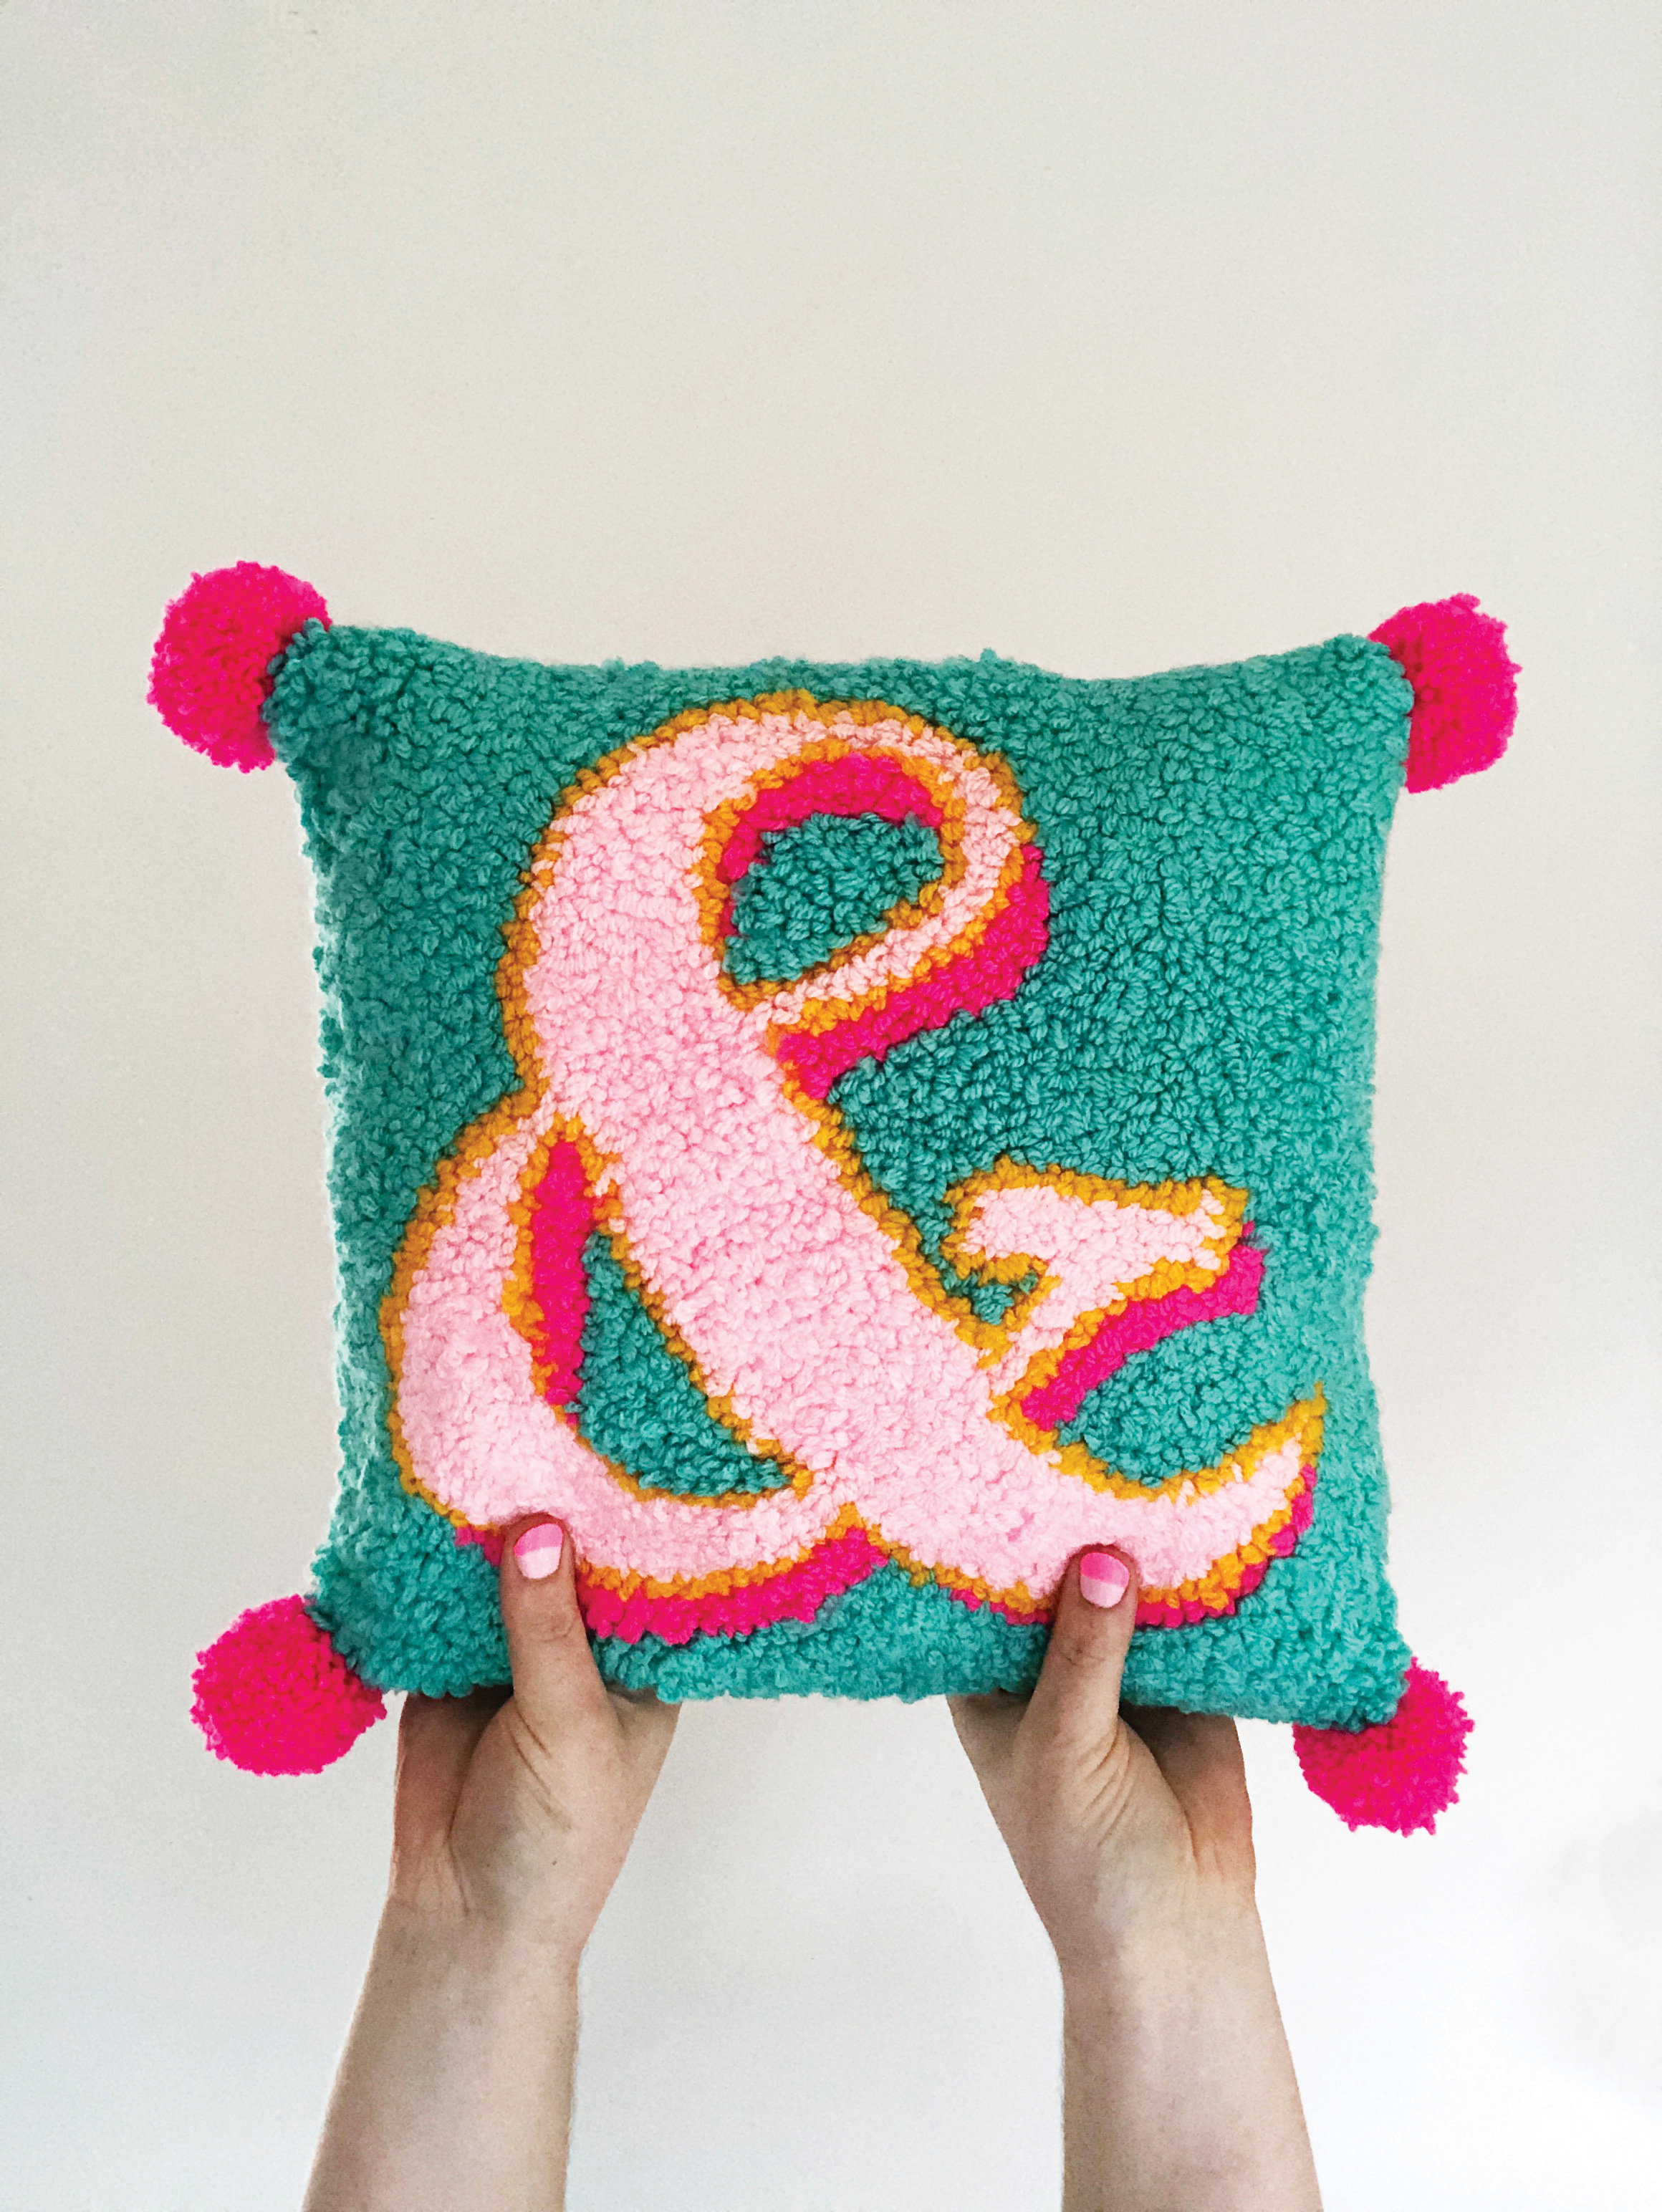
2. You will be working on the back of the fabric, with the other side being the finished piece. It’s really important that when you trace your design onto the fabric, to make sure it is the mirror image. For this I cut out my letter – an ampersand – and turned it upside-down to draw the outline with a marker. I then moved it slightly downwards to create that drop shadow and drew around the drop.
3. Fix your needle to the desired length and carefully thread the needle with the threader.
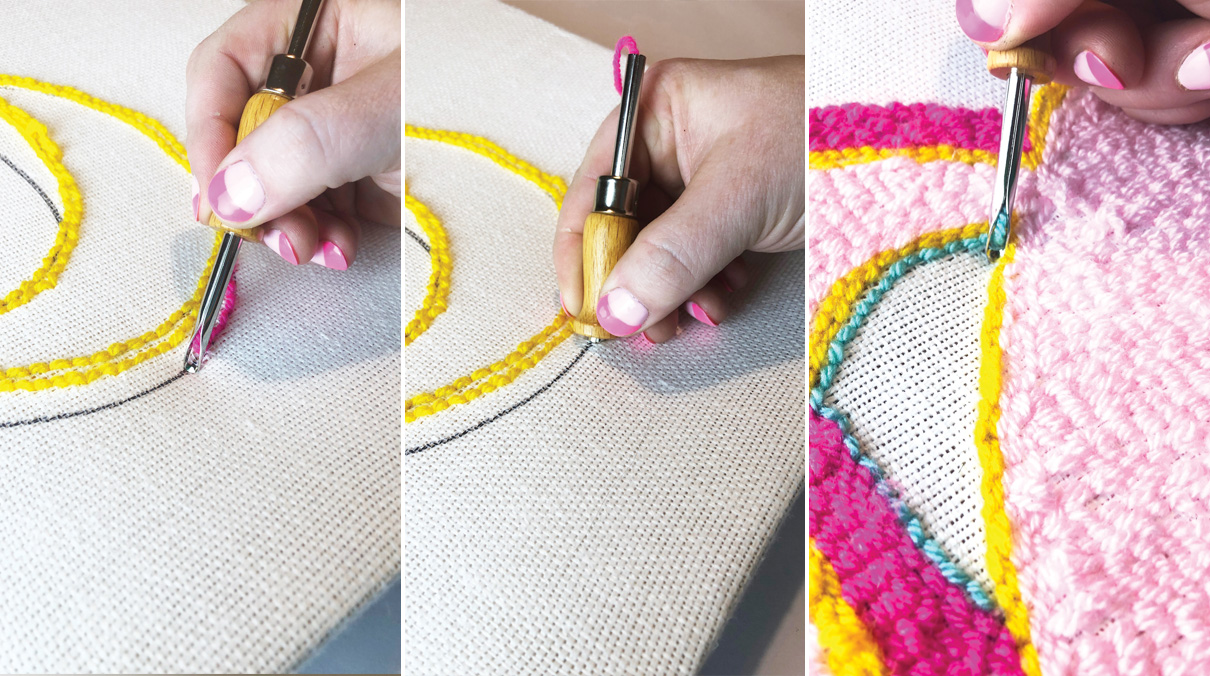
4. Remember we are working on the backside of you fabric (the other side will be the finished side). Starting with the outline first, punch your needle into the fabric and pull the short end of the wool fully through. Hold onto this wool as you secure your first few loops.
5. Always working in the direction of your line, with the needle facing that line, punch the needle into the fabric, making sure it is fully down. Raise the needle back up only to the point of the fabric and no further. Glide the needle over the top of the fabric before you punch in the needle for the next stitch.
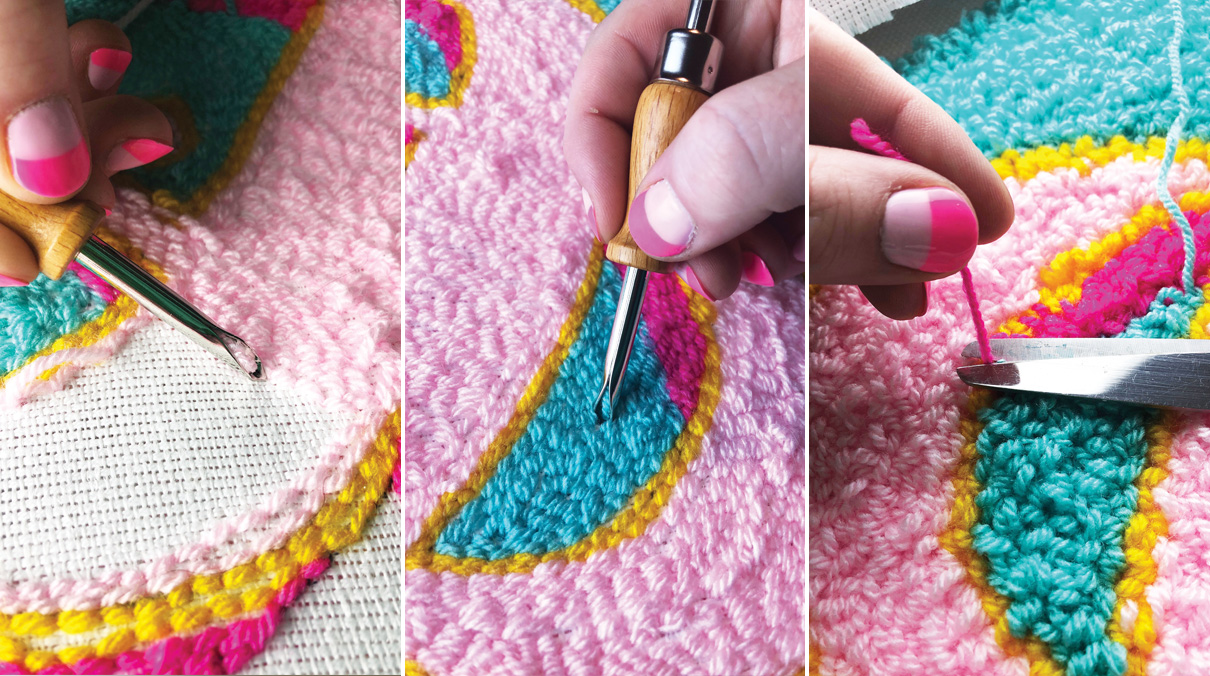
6. Regularly check the other side to make sure your loops are the right length. You can easily pull back the wool if you make a mistake, so don’t worry: just rub the fabric with the needle to put the fibres back in place.
7. When you are turning the direction of the needle, punch the needle in, and while it’s still fully in the fabric, twist it in the new direction, and continue along that line.
8. For each shape you’re completing, outline that shape first and then fill it in. Once you have an area complete and you want to move on to the next area, punch in your needle and turn over to the finished side. Pull the wool through the needle and cut the end with a scissors. You will go back at the end and trim these pieces flush so everything is uniform.
9. Continue until you have all your shapes and areas filled. Now, trim the ends of the wool so you have a uniform surface on the front. If some of your lines are going into the next colour, you can slightly poke the wool back into the correct position with the top of the needle.
10. To finish, press the back of your punch needle project with an iron.
11. Remove the fabric off the frame. These pieces make amazing wall hangings and look great framed in embroidery hoops, but I made mine into a cushion. I created the back of the cushion using a velvet fabric, and sewed three sides with the sewing machine. Lastly, trim all the edges, stuff the cushion with filler and hand sew the final side, adding pompoms on the corners.